
How to Implement Client-Side Routing in React Applications Using React Router.
A beginner’s guide to understanding and implementing client-side routing using React Router


Introduction
Navigating from one web page to another or from one section to another in a modern web application is very vital to the user experience of the application as it allows information to be neatly arranged and found by users.
The movement from one page to another or from one section to another in a web application is imperative as it also makes up the overall flow of a web application, this movement is known as routing.
Routing can be handled by different programming languages and programming frameworks, while it is easy to be handled in some languages or frameworks, it may tend to be difficult to handle in other languages and frameworks hence, the use of libraries for routing.
Libraries make it easy to handle routing in frameworks and web applications, they handle the underlying complexities involved in routing and provide a level of abstraction that makes it possible for developers to easily and quickly implement routing in their web applications and projects.
To implement routing in web applications built with React, a library known as React Router is used.
In this article, you will learn about client-side routing, react-router and its benefits, how to install and set up react-router and how to implement react-router to navigate between components.
Prerequisites
To properly follow along, you should have the following:
A basic understanding of JavaScript and React
Visual Studio code installed or any code editor of your choice.
Client-Side Routing
This is simply the navigation from one page or section to another within an application that occurs entirely on the browser (client side) without the need for a full page reload.
React Router
This is a library that is used to implement routing in a React application.
The Benefits of Using React Router
React Router has so many benefits and that is why it is the standard routing library in the React ecosystem used by many React developers. Some of the Benefits of using React router includes:
It enables developers to easily and quickly implement routing in their web applications.
It can be used to develop single-page applications (SPA).
It helps in location management within applications by keeping track of the current position and providing it to components as a prop.
Getting Started
We need to set up a new react app using create-react-app, to do so, kindly follow the steps below:
Launch Command Prompt
Type the code below and press the Enter key.
npx create-react-app react-router-practiceThe above command creates a new react app with the name react-router-practice. You can replace “react-router-practice” with any name that you want to give the app.
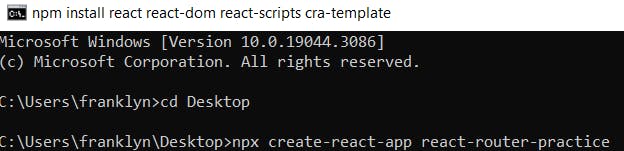
Navigate to the newly created folder by typing the below command and pressing the Enter key on your keyboard
cd react-router-practice
How to Install React Router?
To install react-router, kindly navigate to your project folder as we did above in step III, type the below command and press Enter on your keyboard
npm install react-router-dom@6
The above command will install the react-router package and make it ready for use.
How to Set Up React Router?
To Use React Router, kindly follow the instructions below:
Open the project folder in visual studio code by using the below command:
code .
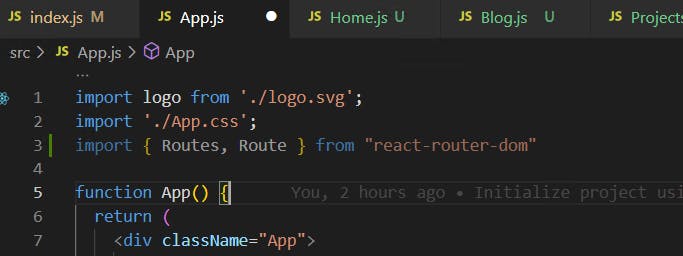
We will then have to import the Browser Router in the root file which is the
index.jsfile and make it available for usage throughout the app.Import the Browser router in the
index.jsfile via the below command:import { BrowserRouter } from "react-router-dom;
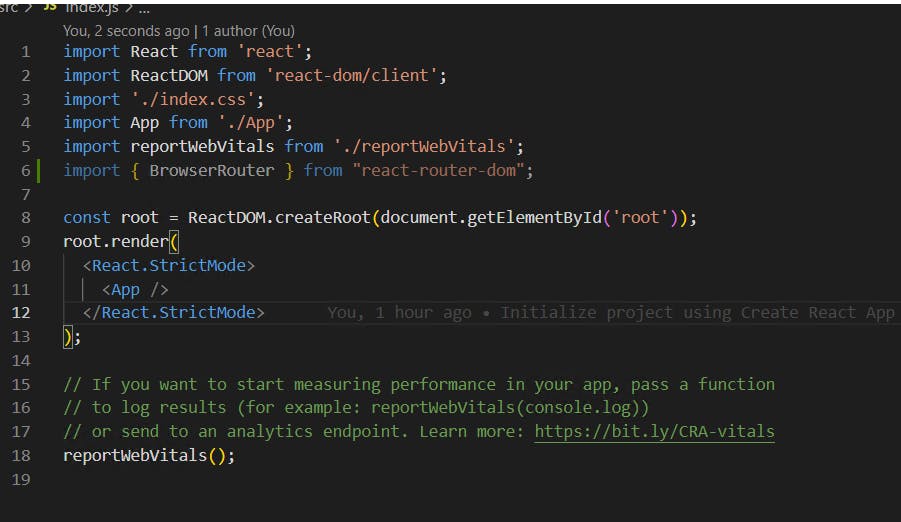
Replace the
React.StrictModetag withBrowserRouterand save the file.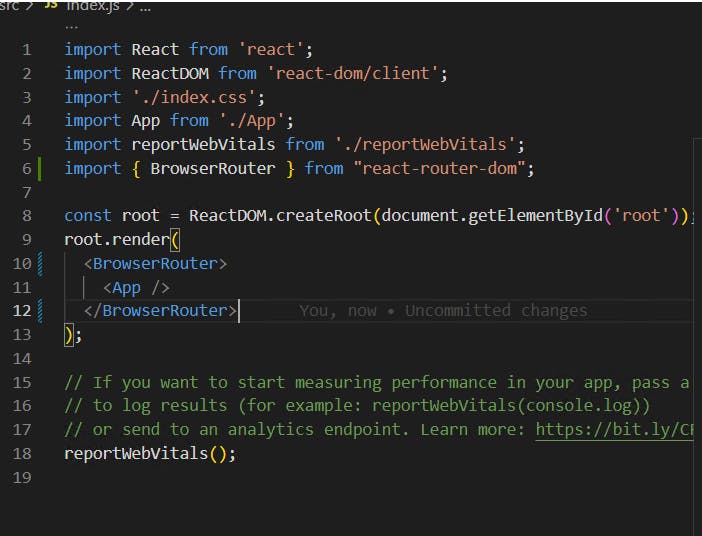
How to navigate to other components in a React application?
We will have to create three components, the Home, Blog and Projects Component.
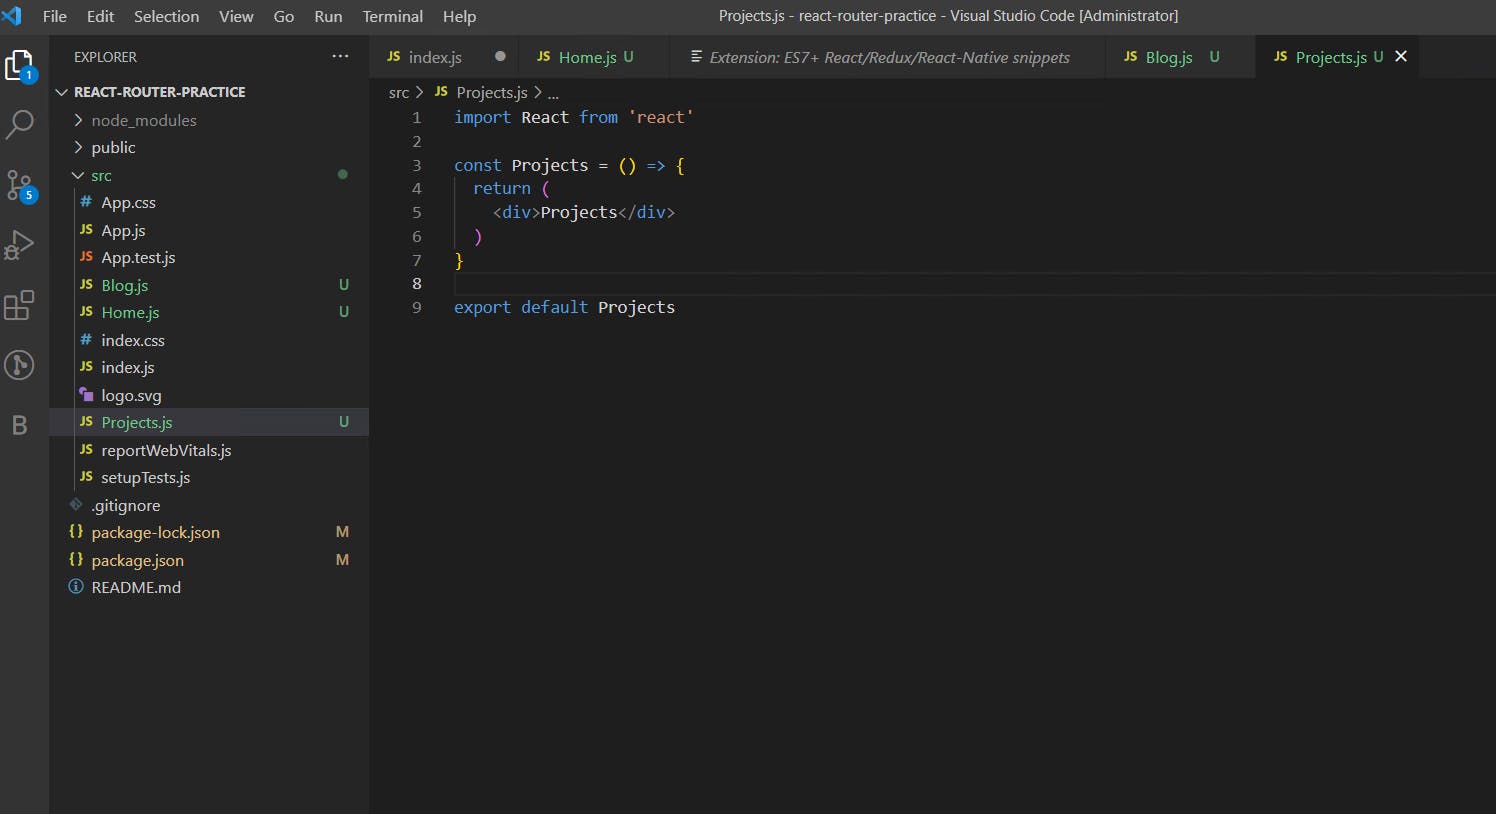
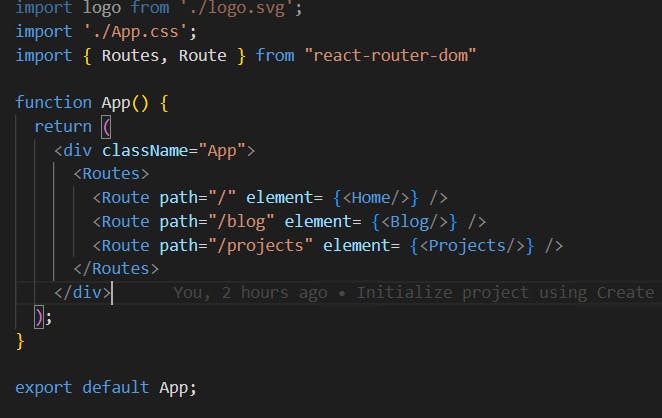
We will implement the routes in the root component which is the “App.js” component.
- Import Routes and Route into the
App.jsfile from react-router dom using the command below:
import { Routes, Route } from "react-router-dom;
Your code will look like the below screenshot
Since we have more than one individual route, we will use
Routesas a container to hold the other individual routes.
Route is used to create a single route and it has two attributes: path and element. Path is used to specify the desired path while element is used to specify the component to be rendered in the desired path. Remember to import the Home, Blog and Projects components.
To navigate to other pages, we will use the Link tag which has an attribute to which is used to specify the path to link to.
- Go to the Home component and import
Linkvia the command below:
import { Link } from "react-router-dom";
Use
Linkandtotag to specify the path to link to.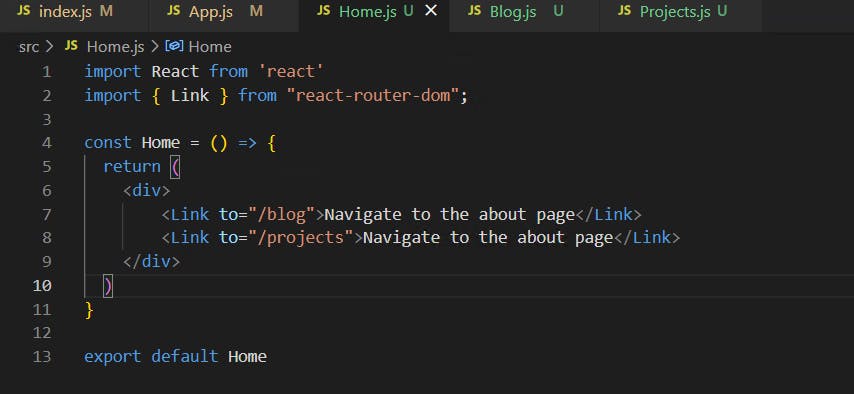
Add line breaks

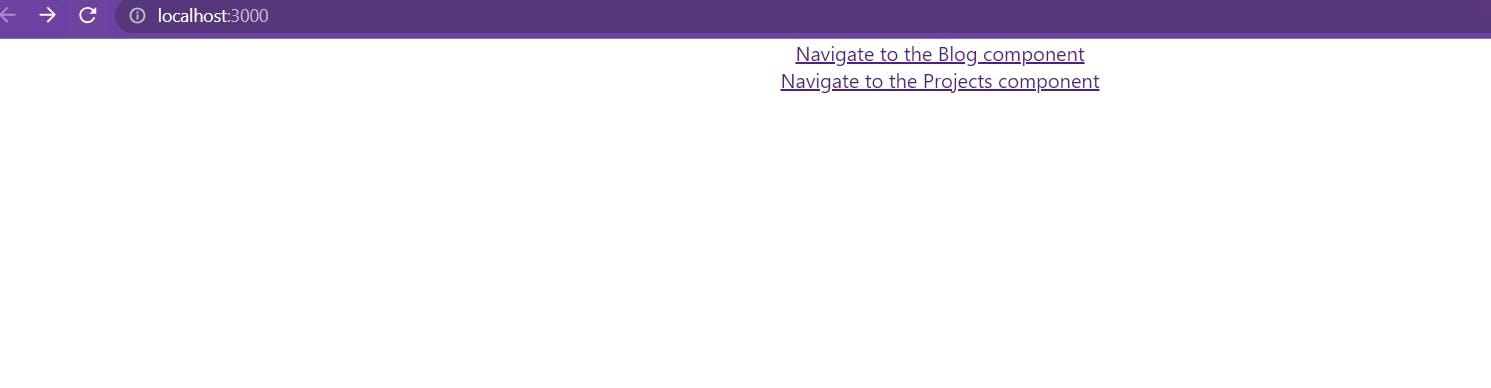
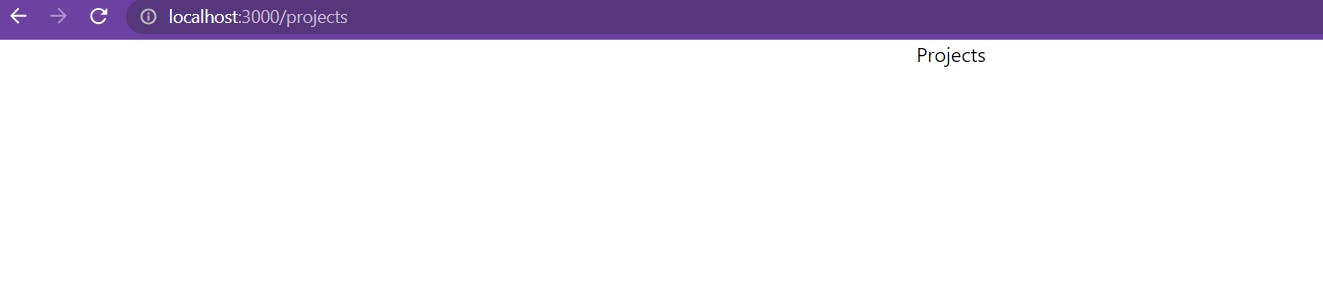
You can style the app as you wish and run the app using npm start, the working app should appear like the screenshot below, you can click on the different links to navigate to the other components.

Conclusion
React router makes it easy to implement client-side routing in a React application. In this article, we were able to learn about client-side routing, react-router and its benefits, how to install and set up react-router and how to implement react-router to navigate between components.
For more information about React router kindly refer to the official documentation below: